The original idea of the multiple tooth blade, was that as the front tooth got damage or wore away, the next tooth behind it would take over and continue cutting, hence prolonging the useful cutting life of the blade before needing sharpening. 
This idea seemed to work reasonably well to some extent, but once the front teeth was dulled or chipped away, the efficiency of the blade drops away very quickly and eventually become no better that most other metal blades. To keep the blade working like I had intended, required regular sharpening which to me was not a problem, but to many it was.
Cause
I have had feedback from a number of customers, saying that it looks too difficult or is too difficult for them to sharpen the blades and so do not try, even though I have a number of videos that showed how easy it is to sharpen them. I have also had some requests for some sort a template that they could be used as a guide to help them keep the correct angles of all the teeth while sharpening.
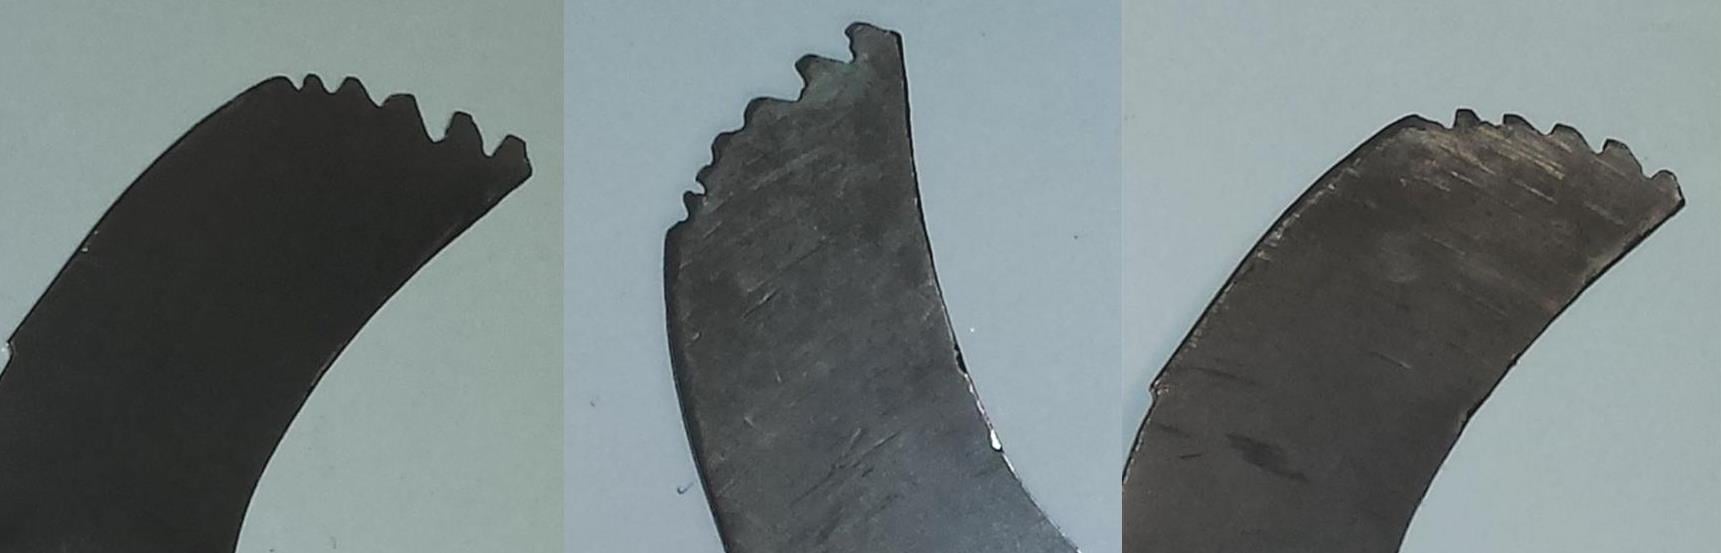
Below are some photos of Flail-blades that have not been sharpened very well and so do not cut very well.


Solution
Redesign the blade teeth to be easier to sharpen while at the same time improving its cutting ability, which is how this new Flail-Blade came about.
Over a number of years of extreme testing of the old model Extra Heavy Duty Blade, I became aware that the idea of one tooth taking over from the next did not work quite as well as I had intended. After studying this for some time, I noticed that when the front tooth became dull enough to not cut very well, but was also not warn away enough to allow the next sharp tooth to its job, cutting efficiency of the blade dropped significantly.
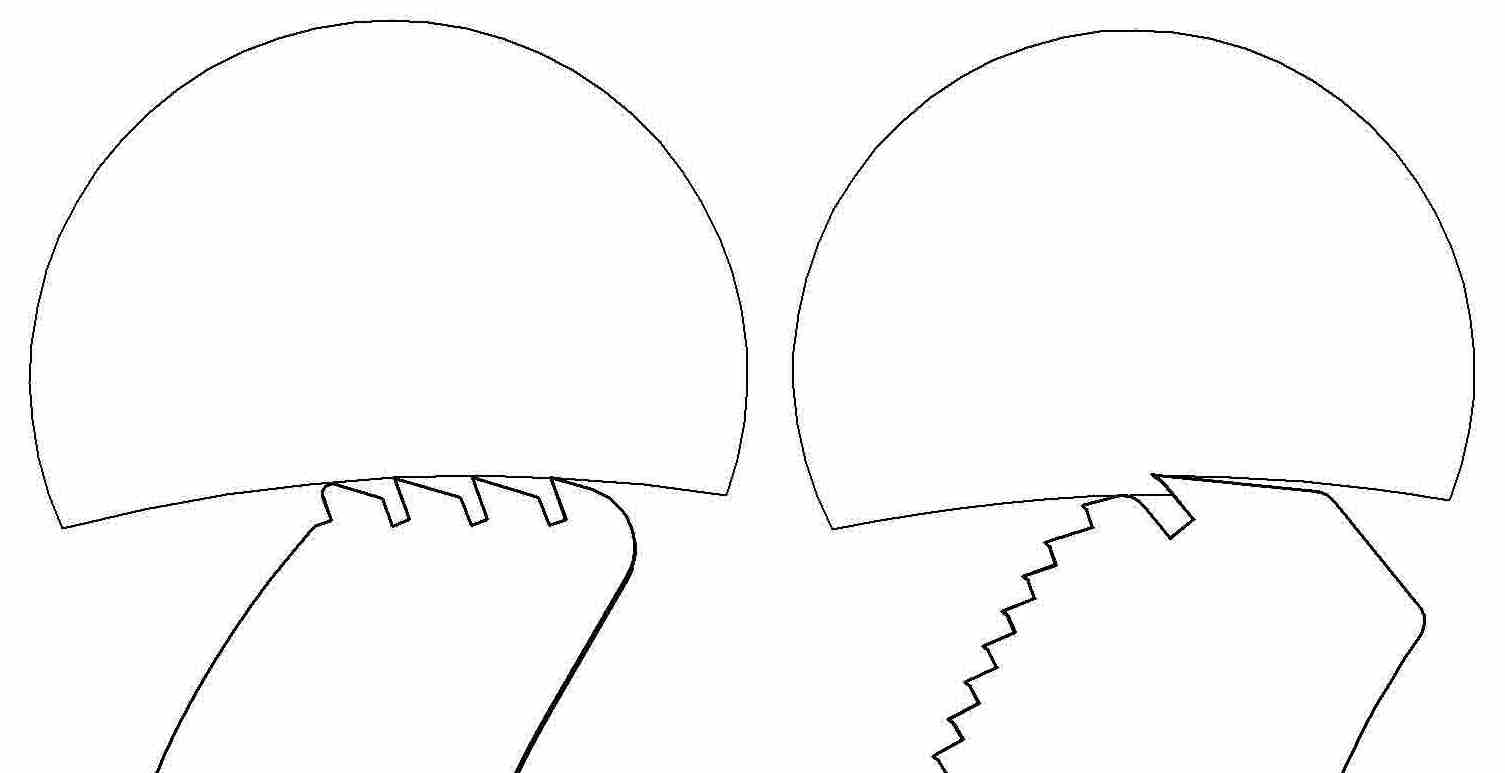
To cut it short, it was basically the front tooth that really did all the work and when it dulled, efficiency dropped off very quickly. It was this that got me into the habit of sharpening regularly and recommending that everyone sharpened regularly. So the obvious conclusion was to just have one tooth and hopefully this would make it easier to sharpen for those that were intimidated by the multi teeth blade. Below is an image of the old multi tooth blade and the new single tooth blade. As you can see on the image on the left, it is the front tooth that does most of the work, but when it is only slightly worn away or chipped, it does not allow the following teeth a chance to take a decent bit into the wood, but just enough to wear those teeth away as well. The new single tooth blade has a depth guard in from of it give the tooth some protection from an impact with a stone and also controls the depth that it can cut to stop it from biting in too hard, stalling and being flicked back.
This new one tooth design gives it a noticeable improvement in cutting, with all the power going into that one tooth, where as when the four teeth on the previous model lost their edge, it caused much more drag and a considerable reduction in cutting ability. This single tooth blade is also much stronger with more metal behind the cutting edge, this plus the impact shoulder in front of the tooth make it less prone to major chipping, so that if it should hit a really hard stone causing it to chip, the chip is genuinely smaller and hence easier to grind out.
The main advantage of the single tooth per blade of course, is the considerably reduced time it takes the keep only one tooth on each blade sharp, so hopefully more users are likely to keep it sharp.
I recommend that the teeth be touched up every time you refuel your brushcutter, the little time this now takes more than pays for itself in area cleared. To make it easier, I have also designed the trailing edge to be parallel to the cutting edge, this acts as the requested template to help maintain the correct cutting angle as you keep grinding the tooth leading edge back to keep it sharp.
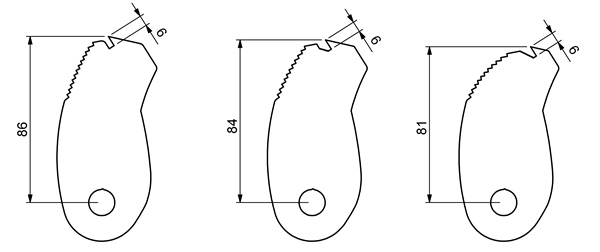
The image above shows how I anticipate the new Flail-Blade wearing down as it is resharpened over time. Once the brushcutter-blade gets much past that shown on the right, I recommend that it is replaced for new blades.
Some of the other improvements of the new Flail-Blade are; the serrated front leading edge which creates high pressure impact points allowing it to more easily shred and mulch tough stringy grass, weeds and small branches. The other important thing about the new Flail-Blade is that its extra width allows you to keep sharpening the single tooth for a lot longer with much less reduction in overall diameter, thereby getting maximum value from each set of Flail-Blades.

The image above gives a comparison between the old Extra-Heavy-Duty-Blade and the new BrushCutter/WeedEater Flail-Blade. The other thing you will notice is that the new blade is much wider; this is to reduce the bending of the blades after a hard impact and allows it to easily slide in between the now much reduced space between the top and bottom hubs.
The new Flail-Blade which is common to both the BrushCutter & WeedEater Blades, has been totally redesigned to be much stronger, cut better and last longer than the previous Flail-Blade.

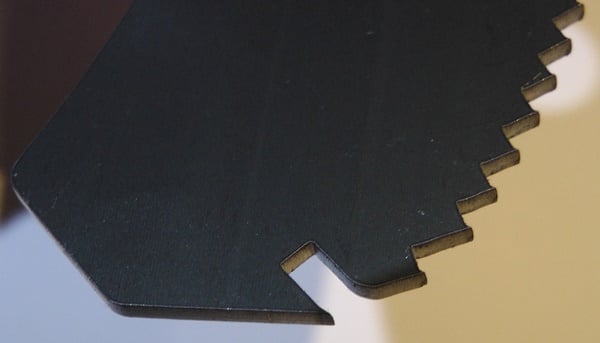
Below are two close ups of the main cutting tooth and the leading edge serrations.

Below is a link, showing you how to sharpen the tooth while the blade is on the brush weed wacker.

![]()
Like this page, please share it with a friend